A Practical Guide to Intercepting Network Requests in Cypress


Cypress has become one of the most favorite testing tools for frontend developers. It caters to the testing needs of modern web applications. In this article, I’d like to walk you through some of the capabilities of Cypress’ .intercept() command. It is a super useful tool, especially for testing hard-to-reach places of your app.
For this blog I am using my Trello clone app. It’s a very simple Vue.js app built with json-server - a single file json database. You can check out a branch in which I’m working here.
First things first - matching our url
When using .intercept() command, there are two main questions that need to be resolved.
How do we match the url? How do we handle that url?
Let’s now focus on the first question.
Consider following Cypress test:
Our .intercept() command is now matching any request that contains the url /api/boards. You can see this in a screenshot below.
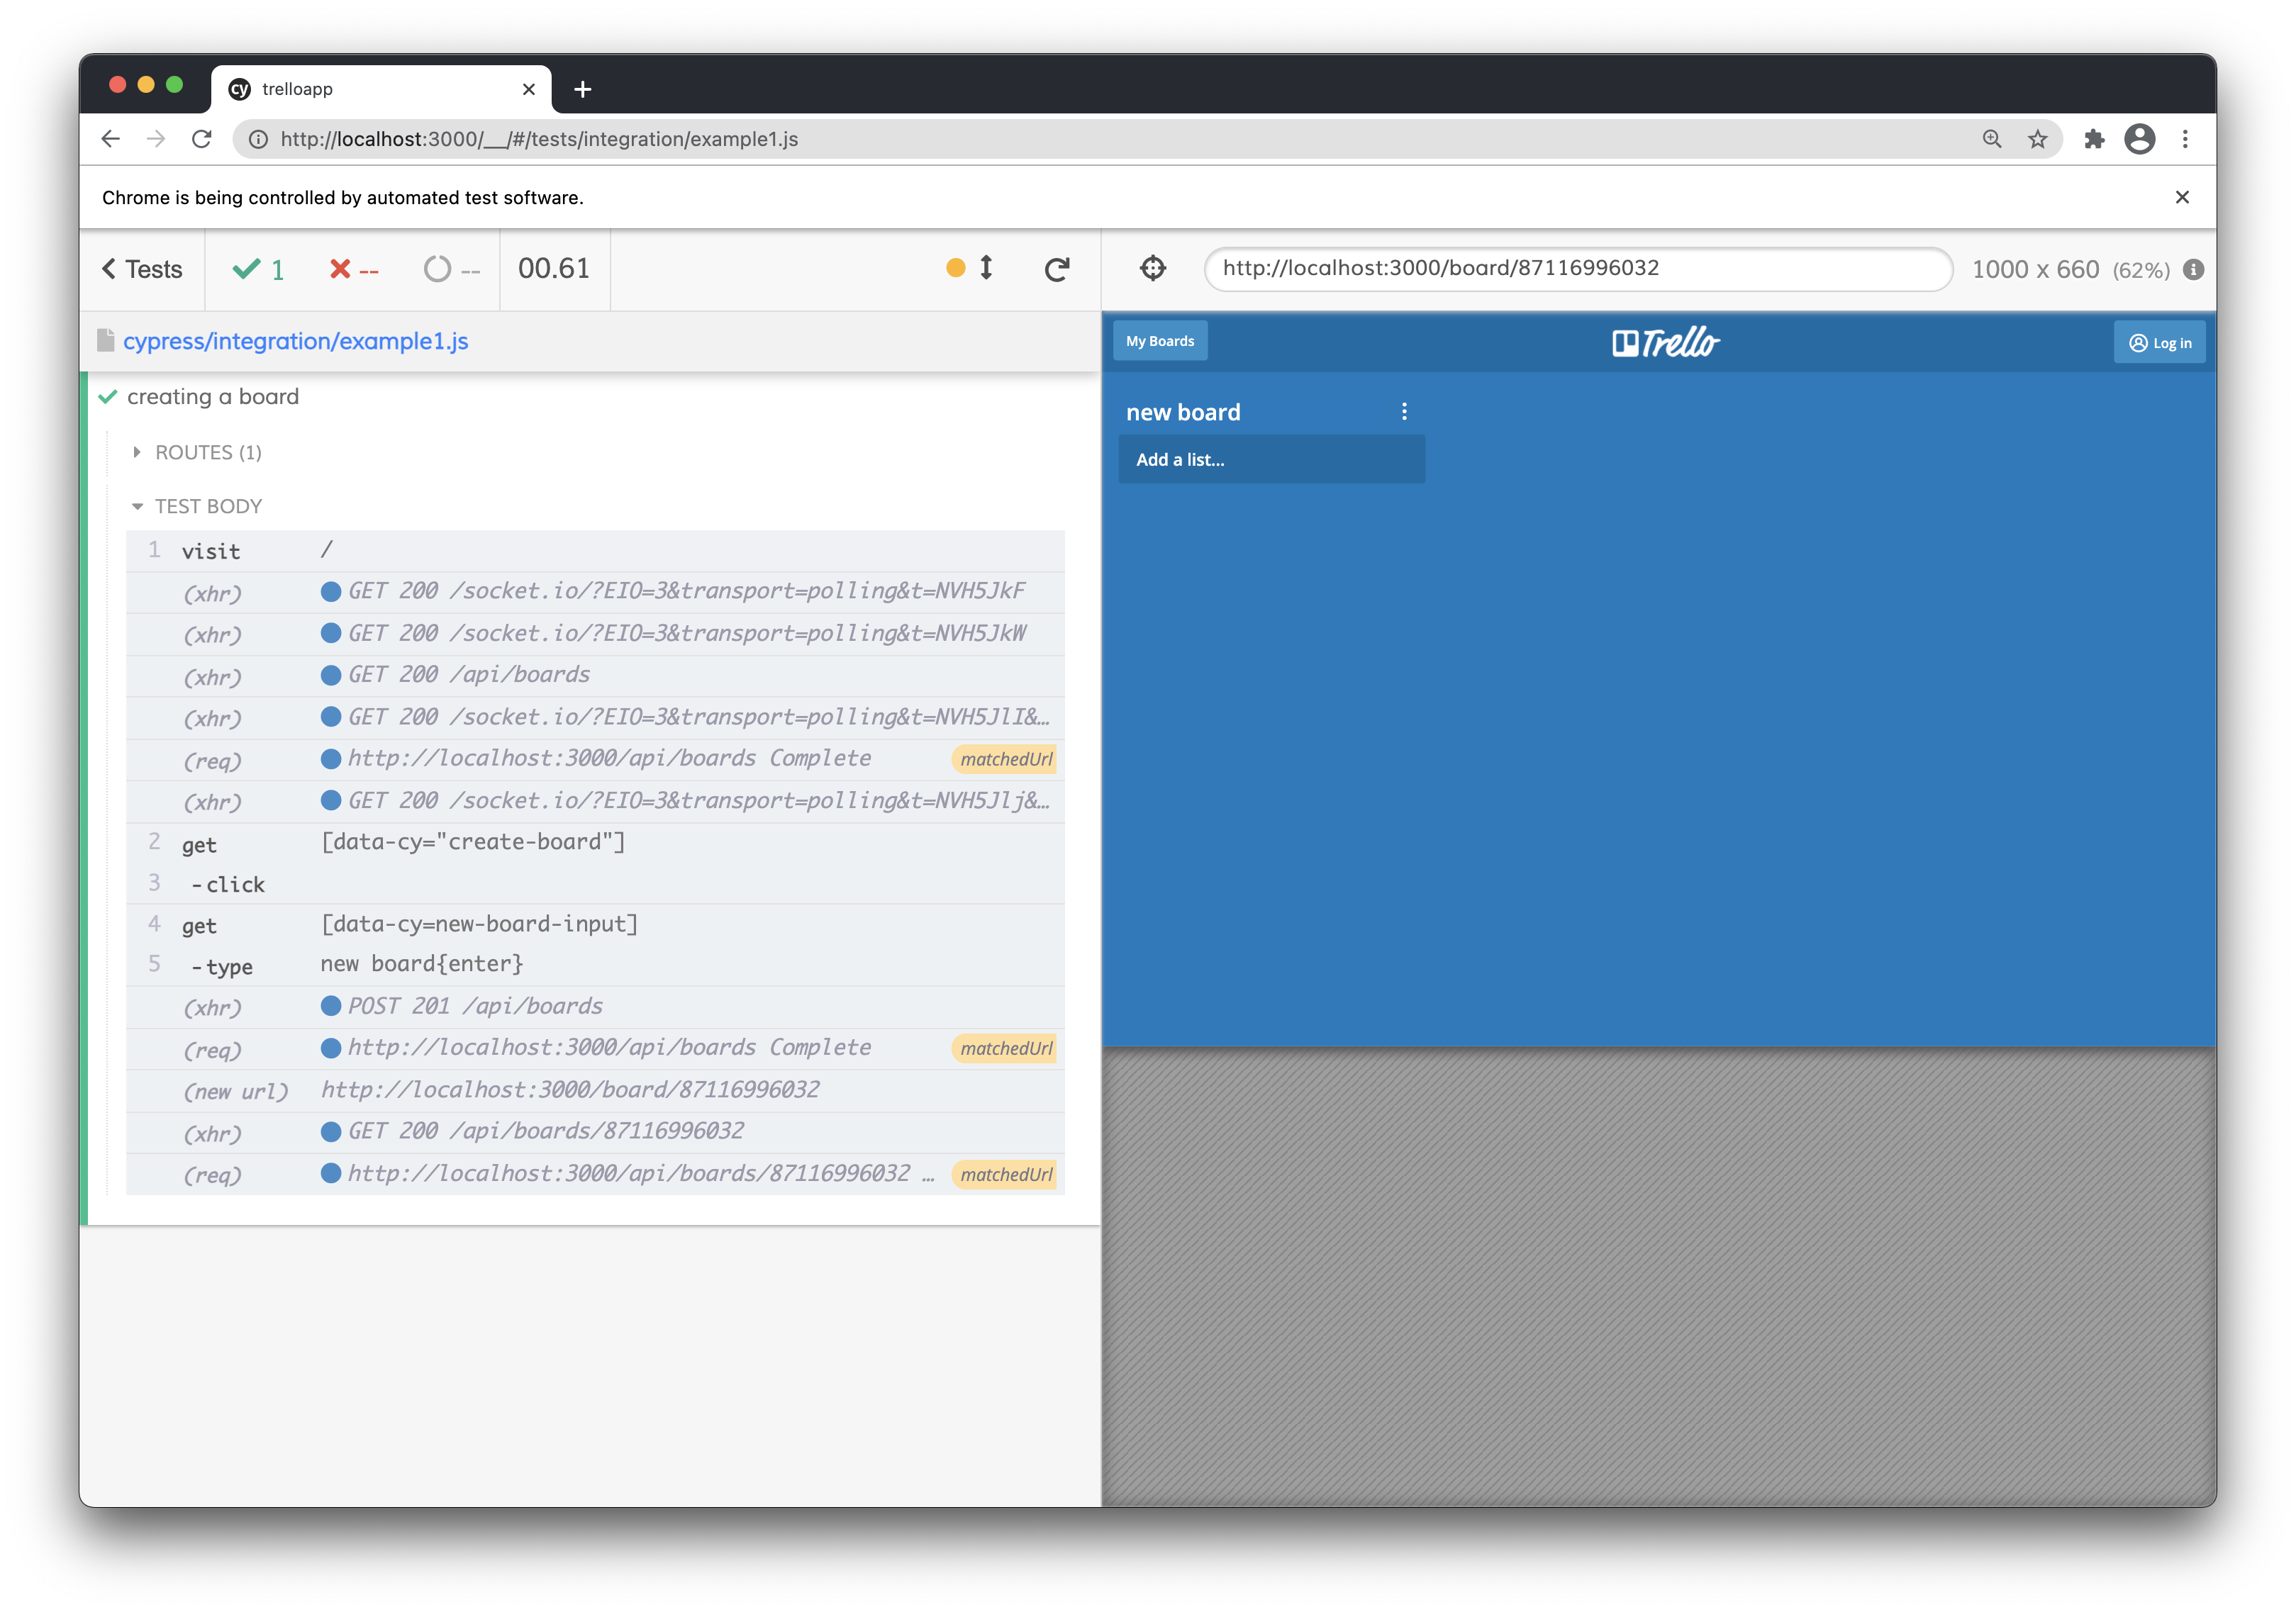
With our .intercept() we have matched three different requests. To target e.g. only our POST /api/boards request, we’ll write our command like this:
We can also match our requests by regex or by minimatch string, so to target our GET /api/boards/87116996032 request that is fired right after we enter our board view we can do the following:
This is useful when we use real API during testing our frontend app and have a generated ID coming from server. With minimatch, we don’t care what the final ID number is, we’ll match anything that fits our requirements. With regex, you can be even more specific.
It’s possible to match url using multiple matchers. To unleash full potential, you can pass matcher object as a first argument:
Full list of attributes can be found in Cypress documentation. Let’s now look at what are the practical uses of .intercept() command and how can it be used to test hard-to-reach cases.
Properly pace a test that is going too fast
In our following test we are facing a weird situation. Let’s first look at the code and then at the video from test run.
Our video shows a passing test: 
This is actually not the result we want. We are asserting that the length of our boar list should be 0. This test is giving us a false positive. It should not pass.
The reason why our test passing is that our .get() command does not actually wait for our network request to give us a response. It selects our element as soon as they appear in the DOM. They might not even be visible yet. Because of this, our test passes while our app is still in the "loading" state, waiting for the server to return the list of our boards
Since we have matched our GET /api/boards request with .intercept() command, we can make sure that our test proceeds only after we get a proper response from our request. Using our matchedUrl alias that we assigned to our interception, we can use .wait() command like this:
This ensures that our test is stable and is actually giving us the proper result. Our .get() function will actually wait for our .wait() command to resolve, and only then start to look for our board item elements. Now that our .wait() is in place, our test will properly fail, as there is a board present in the list.
Testing your app’s API
Now that we have successfully matched our requests, we can take our test one step further and combine our UI test with a little bit of API testing. After we route our request and wait for it to give us a response, we can pass the data to our .then() function and make some assertions:
Using .then() and expect(), we have tested for the proper status code and a part of our response body. Now we actually know that once we create a board, we will receive a proper response from our server.
Maybe even more useful than checking for the response, might be checking for our request. That way we can make sure that our app is sending proper data to our server. For example, we can make sure that request headers are properly attached to a request:
Test more than XHR
If you have worked with network in Cypress before, you are probably aware of the limitation of .route() command that is a predecessor to .intercept(). The previous command was only working with XHR requests, so if your app used GraphQL or fetch, you were out of luck. This is no longer the case. With .intercept() it is possible to work with fetch requests the same way you work with XHR requests.
Not only that, but since the whole network layer has been rewritten, you are now able to intercept static assets like your css or image files, or even work with your GraphQL requests. For the overview of GraphQL, I recommend checking out Gleb Bahmutov’s blog that has tons of great examples.
Create a test for an error case
With testing, developers and test engineers usually start with happy paths. But in order to have a proper test coverage, you might want to check some of the edge cases too. I usually tend to forget about proper error messages, which is not good. User should get a good information on what’s happening when the system does not work.
Let’s say that our user tries to create a new board, but our server has an error, and API returns a 500 status code. Is there a message that will be displayed to inform user about this?
This is where .intercept() starts to show its true powers. Besides matching a request, we can handle our request in many different ways. For example, we may make it act like there is a network error:
This enables you to test for various types of server errors, but you can be more broad and test for a general network error:
There are couple of more options, like delaying your response or throttling the network, and you can find all the options in the documentation.
Create a test for a large list
Another cool thing about .intercept() command is the capability to modify the API response. This is especially useful for testing for larger amounts of data. You want to be able to tell that e.g. your list does not break when user adds an unusual amount of items to your list. Instead of trying to seed the database or sending a bunch of requests, you can just substitute a response from server.
For cases like this, you can load a json file from your fixtures folder like this:
There’s also no need to specify path or extension or even import the file. If your longList.json is in fixtures folder, Cypress will read it and use it as your server response.
Ready to pick up the pace?
Enter your email and receive regular updates on our latest articles and courses


We're here to help.
Sign up for our FREE email course
- ⭐️ Portfolio Building: Learn how to build a badass developer portfolio so you can land that next job
Start your test with a clean state
Let’s now try the exact opposite. We might want to start with an empty list instead. This is helpful especially if you create some data in a previous test, but don’t want that data to affect your current test. Using a fixture is fine, but for such simple cases, you can just define the response body right in your test:
Dynamically change data
We can take things one step further with a route handler function. Instead of passing an object as a route handler, our .intercept() command will take a function and dynamically change our server’s response.
In our next example we have a list of boards. With our route handler function, we are changing the attribute starred to have the value of true. So we take real data from our server and dynamically change values we want to change.
This is especially useful when you want to use just a part of your real data. I use this to test visibility of a popup notification when user opens the app with expired subscription. No need to create everything from ground up, just tweak a couple of attributes and see if app behaves as expected.
There are couple of gotchas one needs to think of when using .intercept() command. Gleb Bahmutov wrote a pretty nice blog about this. In the shown example, you can see that I delete if-none-match header to prevent getting a cached response from server. Which brings me to another practical use case, which is connected to changing headers.
Handle authorization
Our app uses a very simple authorization with a Bearer token. Once we have this token in place, we can use it and add it as an authorization header to all of our requests.
Now that we add this header to all of our requests, our app behaves as if we are a signed in user. This saves us some time, and we don’t need to log in via UI every time we want to view the app as authorized user.
Set up your app for special cases
Since we are able to change anything in our requests we can setup our app for various special cases. I once dealt with a case where we needed to test different login scenarios, but our login page had CAPTCHA protection implemented. This meant that when we were on our fourth scenario, our CAPTCHA would show up and we’d have to solve the captcha puzzle. Which was pretty much impossible.
The easier way to deal with this problem was to add a special header via .intercept() command. When this header was received on our staging server, we would bypass rate limiting and were free to test as many scenarios as we wanted without CAPTCHA ever showing up.
Just for fun: substitute an image
Since .intercept() can route almost any type of request, we can use it to match a network call for a static assets, e.g. our app logo. With route handler object, we can swap our Trello logo with a Cypress logo.
While this may just seem like a funny thing to do, there may be some use cases, where you might want to substitute images on your site. Imagine you would swap original images with a transparent pixel. This might be of some help when dealing with screenshot diffing and you have an animated gif on your site.
Stubbing vs. not stubbing
All these options are definitely fun to play with, but it’s good to remind ourselves of what the goal of a test should be. .intercept() is certainly good for testing hard to reach edge cases. But there are definitely some advantages to use real API for your tests. For one - it is real API. Anytime we are stubbing our response we are diverting from what the real server would give us. That might cause some false positives and let a bug slip into production.
Ready to pick up the pace?
Enter your email and receive regular updates on our latest articles and courses
We're here to help.
Sign up for our FREE email course
- ⭐️ Portfolio Building: Learn how to build a badass developer portfolio so you can land that next job