Manage Reactive State with SolidJS Signals


Check out Colby's Youtube for a video lesson adaptation of this article.
State management is hard enough having to think about when and where that state should update, but on top of that, you have performance implications like cascading re-renders to worry about if you don't keep an eye on how you're implementing it.
To alleviate some of these concerns, we can use Reactive State using tools like SolidJS Signals that help ensure we're only updating the parts of the pages that actually need an update.
What is SolidJS?
SolidJS is a library for building reactive UIs.
Similar to React, Vue, and others you may already be familiar with, it SolidJS performs the important role of giving developers a way to more intuitively manage what they're rendering on a page.
But back to the "reactive" bit, SolidJS does things a bit different than most of the mainstream UI libraries. Rather than trying to force (but not really force) a pattern that discourages concepts like mutating state, SolidJS embraces it, taking advantage of the pattern to bring performance wins to the table.
What are Signals?
You can kind of think of Signals as the "state" of SolidJS, even though they're a different concept. The Solid team calls it "fine-grain reactivity".
Signals retain a value and change over time based on actions or updates performed from within the application.
Because of how Signals work, whenever a Signal is updated, anything using that Signal will also update. This helps to avoid having to deal with re-rendering the working component or a tree of components that depend on that value.
So instead re-rendering large portions of components on the page, only the parts that are actually using the Signal update, which is a nice win for performance!
What are we going to build?
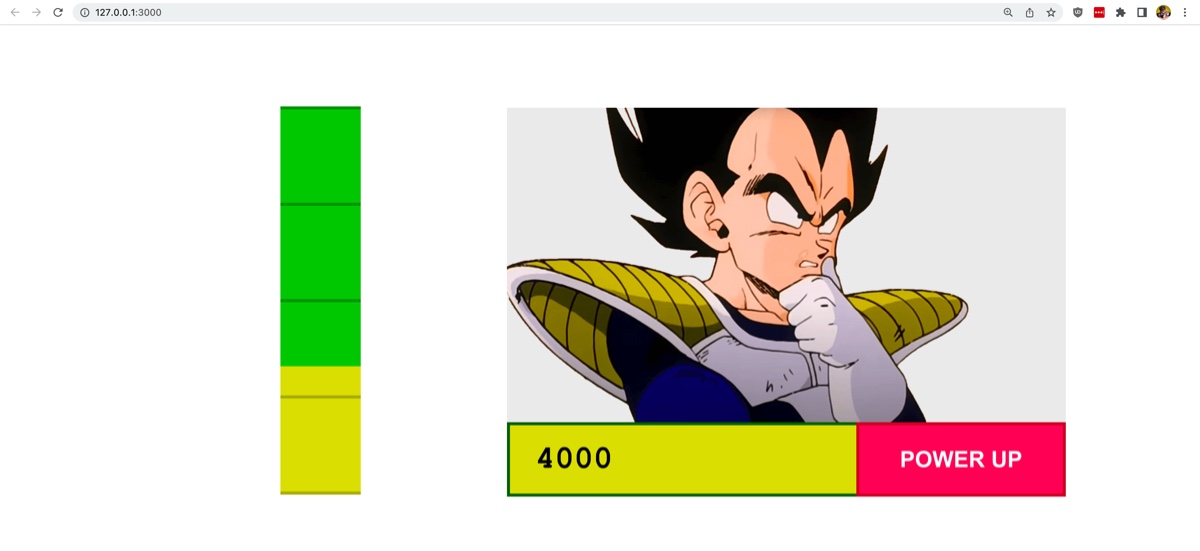
We're going to start off with a SolidJS template that I created that includes a button and a power level. While this doesn't function out-of-the-box, our goal will be to use Signals to dynamically update that value based on the actions performed.

Through this, we'll learn how we can also apply other SolidJS primitives that allow us to take advantage of the optimization benefits of Signals.
Step 0: Creating a new SolidJS app from a template
To get started, we'll first need to create our new project.
In your terminal, run:
This will use a tool called degit to clone down the starter template into a directory called power-level-meter and remove any Git history associated with the repository.
Next, let's navigate into the directory:
Then, install the project dependencies:
And finally, start your development server with:
This by default will start your server at http://127.0.0.1:3000/.
And once you load that page in your browser, you should now see your new SolidJS app!
Step 1: Updating a value on button click with Signals
When clicking our Power Up button, we want our power level to update (increase!) instead of remaining a static number.
To do this, we need to establish a new Signal which will allow us to control that value and update it based on the click action.
First, let's update our import statement at the top of src/App.jsx to include createSignal from solid-js:
To create a Signal, at the top of the App function, add:
Here we're creating a new Signal that defaults to the value of 0. We destructure the return value of createSignal which is a "getter" and a "setter", which allows us to obtain the value with powerLevel and set the value with setPowerLevel.
Tip: If you're familiar with the React world, you'll notice this is a very similar pattern. The biggest difference is how the values are retained and updated throughout the app.
Before moving on, also remove the following static definition:
To use our new Signal, we need to update how we're referencing it.
A Signal is made up of a function that allows SolidJS to track it's value, track the references to that Signal, and dynamically update the parts of the page dependent on that Signal whenever it changes. The fact that we're using a function is part of the magic behind how Signals can only change whats needed!
This means, inside of our application, we need to update any reference of powerLevel to become a function invocation.
Find the three references to powerLevel inside of src/App.jsx including:
.powerMeterLevelheightdata-power-activevalue inside Index.readerLevelvalue
And update it like the following:
At this point, if you open up your application in the browser, you'll notice our power level remains 0. So let's fix this.
Any time someone clicks the Power Up button, we want to raise the power.
On our Power Up button element, let's add an onClick handler so we can perform an action:
Next, we need to define handleOnPowerUp.
Below where we're creating our powerLevel Signal, add:
We're saying that any time the button is clicked, we want to take our current power level, add an incremental value that's stored in POWER_UP_AMOUNT, and use setPowerLevel to update our Signal.
If you head to your browser and click the Power Up button, you should now see the power level raise!
Now there's one issue, if you set the power to over 12,000, you'll notice that we actually exceed our power meter.
We can avoid incrementing the power if we're at the max power by adding the following:
We're comparing the current power level to a value set in MAX_POWER and if we're at that max power, we return and avoid performing any action, meaning, we can safely continue to to power up as much as we (or our visitors) would like!
Be the first to know when we publish more SolidJS content.
Enter your email and you'll be on the list.
Step 2: Changing an image based on a Signal's value with Switch and z-index
If you're familiar with the image inside of our application, that's Vegeta, and he's concerned about the level of the powmeter meter.
To show his ever increasing concern the more the meter raises, we can change the image based on the meter's amount.
To do this we can use SolidJS Switch to help our control flow.
First, let's update our SolidJS important statement:
As far as the images are concerned, you'll notice that I'm already importing a variety of reader# assets, which are the images we'll use sourced locally in the app.
But we'll want to update our existing on-page image with a more complex flow of how we want to display it or the others.
Let's add a Switch statement that replaces our existing image, allowing us to show an image depending on the value:
Here we're using the Switch/Match pattern, where inside of our Switch, our Match components take a prop of when which looks for a truthy or falsey value, determine whether or not to show that item in the Switch.
Each of those when expressions determine what point the power level is at, changing the image at 3,000, 6,000, and 9,000.
You might also notice we're still using our function invocation pattern for powerLevel() which is important to be sure that whenever that value changes, this part of the application recognizes that change.
If you head to the browser and click the Power Up button above those increments, you'll notice the image changes!
However, not to nit-pick too much, I see once minor issue, where there's a brief flicker between image loading whenever we switch to a new one.
This is a small issue, but I prefer it to be smooth, so what's the issue?
For most uses, the Switch/Match pattern will work perfectly fine. Typically you're using words or values that don't require network requests or a bit extra rendering, but because we're loading images, we may see that flicker as the images loads and renders.
But we can fix this using a different method, where we can load all of the images on the page from the start (with lazy loading) and use z-index to rotate in our images.
Replace the Switch with:
In the above, we're including our four different images right from the start, but by using the style property, we're dynamically setting the z-index based on the same expressions we used in our Switch.
By default our z-index is 0, but when a power level image is active, its z-index will flip to 1, moving it to the front of the image stack.
Now before continuing, an important thing to note, is that some of the base styles that allow us to rotate in our active image live inside of the src/App.module.scss file, which mainly is making our readerImage parent have a position of relative and our image a position of absolute which allows us to take advantage of z-index.
It's also important to note that we're using a loading strategy of eager for our first image, since it's important to our first render, and making the other images load lazily.
But finally, let's open up our application and power up. Once we hit each threshold, we should notice that we no longer get a flicker, but our next image is loaded instantly!

Step 3: Automatically updating a Signal's value based on inactivity with setTimeout
In order to maintain a high level of power, one must continuously work to increase that power (or to keep it where it's at).
In other words, the power level (or value) will automatically decrease unless someone is constantly leveling it up or if the power has reached a threshold, designated by lines on the meter (3,000, 6,000, and 9,000 from before).
To do this, we can create a timeout mechanism using setTimeout where every set amount of time (like 500ms / .5s), we automatically decrease the value. If no action has been taken after another 500ms, we decrease the value again. And so on.
Starting off, let's create a new function that allows us to control this.
Under our handleOnPowerUp function add:
Inside of this function, were using setTimeout to delay our action from happening by 500ms. Once that 500ms hits, we're taking our existing powerLevel() and decreasing it by a fixed value stored in POWER_UP_AMOUNT and using setPowerLevel to update that value.
After that power level has been updated, we call this same function again, meaning, it will keep repeating.
If we head to our app and try to click Power Up, we'll first notice it goes up.
But then it quickly goes down and keeps going down with nothing we can do.
We have two issues here...
First, we don't want to have a negative power level, what does that even mean?
Second, if we keep clicking on Power Up, we want that to cancel out any power release that's active so that we can actually have a cache to power up.
Starting with the negative power level, we can control this by wrapping the inside of our setTimeout with a conditional.
Update releasePower to:
Here, we're first making sure that the power level is above 0 before we take any action. We're also checking to see if we're above any of the power increment levels (3k, 6k, 9k) at which point if we are, we won't decrease the power.
To do that, we're using the modulus operator (or remainder) to check if our current power is divisible by our increment amounts. If there is a remainder, that means we're above one of those levels, and we are safe to decrease.
Checking in on our app, this helps our first issue.
Next, whenever we click Power Up, let's cancel our timeout.
To do this, we need to store a reference to this timeout, so above and outside the App function definition, add:
Then inside of releasePower, we'll set the return value of setTimeout to timeout:
And finally, we need to proactively cancel this timeout any time we power up.
Inside handleOnPowerUp, after setPowerLevel but before releasePower, add:
This uses the global clearTimeout to cancel the timeout we're storing a reference to.
Once we return to our browser, we have a much more reasonable release of power between powering up.

As one last step, we can also make sure that we're cleaning up any resources that might get lost between page or state updates.
If we set a timeout and quickly move away, maybe, just maybe, we could get some unexpected side effects after that timeout completes.
So to proactively avoid that, we can use the onCleanup method to make sure we tie up those loose ends.
First, import onCleanup from SolidJS:
Then under our Signal, add our cleanup method:
And while you won't notice anything different in the browser, we should have a little more confidence in that our app will work as expected!
Step 4: Simplifying and composing Signals with Derived Signals
With increased code complexity comes increased complexity of managing the Signal values and any values related to or using that Signal.
We can simplify this by using the concept of Derived Signals, which pretty much is a Signal in itself, but allows us to compose or abstract the value we're using with a function. Because it's using a Signal as part of it's definition, it will automatically update, just like a Signal.
Take for instance within our app, we're calculating the power level percentage multiple times, which takes the power level, divided by the maximum possible power (MAX_POWER), and finally multiplying it by 100 to get to our percentage.
We can turn this into a Derived Signal.
Under our powerLevel Signal, add:
Here we're defining our powerLevelPercentage as our derived signal, where we're using a function to determine it's value. Inside we reference our powerLevel Signal along with the logic we mentioned above.
Because we're defining powerLevelPercentage as a function that references our invoked primary Signal, we're creating a Derived Signal which will update on change just the same.
Replace all instances of our calculation in the app, which should be two locations:
.powerMeterLevelheight.data-power-activevalue inside of Index
We'll notice at this point that nothing changed and that's expected!
With Derived Signals, we're composing our Signals, creating a single defined value, made up of the result of our primary Signal within an expression.
While this is a simpler example, as our application(s) grow more in complexity, this can become useful for simplifying and improving the readability of our code.
What are some more resources?
To dig in further to Signals and SolidJS, check out the SolidJS tutorial: Solid JS Basics
Be the first to know when we publish more SolidJS content.
Enter your email and you'll be on the list.