Rails + GraphQL + TypeScript + React + Apollo


This is going to be a long post about how to setup a Rails application to serve a GraphQL API, that is then consumed using a combination of Apollo, React, and TypeScript on the frontend. All within the same application.
I believe this is a good choice of stack for two main reasons:
- GraphQL provides a much cleaner query API than a REST API does -- especially because I can request only the data I want at any time.
- With TypeScript and another utility called
graphql-codegen, I can ensure the types that are served by my API match exactly to the types used in my frontend at all times.
For this post, all the code is written from the perspective of having just run the command to create a new Rails application:
There's no fancy configuration here, just plain Rails.
This guide is written in a way that should allow you to apply the same concepts to your existing applications if you have one of those you want to use.
This guide is for intermediate Rails developers, and it will gloss over a few of the fundamental Rails concepts such as models, migrations, views, routes, and controllers. I will assume you know those by now.
What won't be glossed over is the GraphQL, TypeScript, React, and Apollo setup. After all, that's why you're reading this post in the first place.
This guide will feel long, but most of it talks about things that are a one-time setup cost. We pay this large cost now so that our application is easier to develop over the much, much longer term.
JavaScript? In my Rails app?
For a long time, there have been efforts to have one flavor or another of JavaScript be a part of Rails itself. It started out with Prototype.js, and moved onto jQuery, to now a situation where Rails does not thrust its opinion of a JavaScript framework into your application -- you're free to choose.
There has been a modern push for Rails applications to integrate further with modern JavaScript frameworks, such as React and Vue. Nowhere is this more evident than the fact that modern Rails applications now include a gem called webpacker. This gem provides an interface between the Rails application and any dependencies provided from the frontend by Webpack.
You can specify your JavaScript dependencies in files called packs, and then load those into your Rails application using ERB code.
Brand new Rails applications have a file called app/javascript/packs/application.js:
While these dependencies are typically JavaScript, although they could be CSS or images too.
This file is served out of the application via this line in the application layout (app/views/layouts/application.html.erb):
When you run rails s and access http://localhost:3000, Rails will compile the Webpack assets and serve them through the Rails server itself.
What about webpack-dev-server?
If you don't want to wait for a request to tell Webpack to compile assets, you
can run bin/webpack-dev-server as a separate process and your assets
will be compiled as soon as they change, rather than whenever the page is refreshed.
The difference is usually about half a second, but in larger applications, it can
be much longer than that. My advice would be to always rely on bin/webpack-dev-server.
This app/javascript/packs/application.js will be the file that will be the place we load our JavaScript into our application. It doesn't have to be the only place, we could in fact spread this out over multiple different packs, if we wished:
If we approached it this way, then we could split our code up and only load whatever assets we needed to load on certain pages. Perhaps we only want to load the users content on some pages and the checkout code on others.
For this tutorial, we'll stick with one application.js file.
We'll return to this app/javascript/packs/application.js file later on when we implement some frontend code. Before we need to build our frontend, we'll need to serve some data out of our Rails application. And to serve that data, we're going to use GraphQL.
Setting up our Rails application
Before we get to setup GraphQL, we'll quickly setup a model and some data in our database. Then we'll get to GraphQL.
Model setup
Let's begin by creating a new model within our application and migrating the database to create the table for that model:
After this, we'll need to create at least one book so that we have some data to be served through the API:
With our model setup with some data, we can now add our GraphQL API, which will serve this data for the model.
Setting up GraphQL
There is a gem called graphql, which has all the things we need to have to use GraphQL within our Rails application. Let's add it as a dependency of our application now:
Next up, we can run the installer that comes with that gem:
This will setup a few classes within our application, and we will use some of these in this guide. Of note are:
app/graphql/books_schema.rb- Where the GraphQL schema for our application is defined.app/graphql/types/query_type.rb- Where fields for GraphQL queries are defined.app/graphql/types/mutation_type.rb- Where fields for GraphQL mutations are defined.
At the end of this setup, we will see this message:
Gemfile has been modified, make sure you
bundle install
The modification that has been made is that another gem called graphiql-rails has been added to our Gemfile, along with two routes to config/routes.rb. Let's run bundle install before we forget to:
The two routes that were added to config/routes.rb are:
The first route enables GraphiQL, a graphical interface to GraphQL, which is then accessible in our application at http://localhost:3000/graphiql.
The second route is where our GraphiQL and our frontend will send GraphQL queries to. The GraphqlController was generated for us by the earlier rails g graphql:install invocation.
Let's now setup a GraphQL object to represent books in our GraphQL API by running this command:
This command will inspect our Book model and create a GraphQL type that exposes all attributes from that model. It create this file at app/graphql/types/book_type.rb:
We could remove any of these fields if we did not want to expose them through the GraphQL API. But for now, we'll keep them.
To use this type, we can declare a field over in app/graphql/types/query_type.rb. We'll delete the example one that is there at the moment and turn this file into this:
Fetching all records from a database considered dangerous
Fetching all the records at once in a table might mean you end up with a lot of records. In the past, you might've used something like will_paginate or Kaminari to do pagination in your application.
GraphQL uses connections for this, but we will not be covering that in this guide.
This will allow us to query our GraphQL endpoint and retrieve all the books by using this GraphQL query through GraphiQL:
Well, we could! But graphiql-rails is currently broken with Rails 6.
GraphiQL workaround
The version of GraphiQL bundled with graphiql-rails is broken, and so we will need to work around this problem.
Let's start by removing that gem from the Gemfile:
And we'll remove the route from config/routes.rb as well:
An alternative app we can use is the GraphQL playground. Download a version for your OS from the releases page on GitHub.
To make this application work with our Rails application, we'll need to make one little change in the GraphqlController. We need to uncomment the protect_from_forgery line and turn it into this:
This will ensure that local requests -- requests from the same machine the application is running on are allowed through, but everything else must send through a CSRF token. Our Rails application provides the CSRF token, and we'll see that used a little later on when we get to using Apollo. The CSRF token will be validated by Rails, and only requests that use a valid CSRF token will be permitted to make requests to our API.
Load up GraphQL playground and put in http://localhost:3000/graphql as the endpoint. In the left panel, enter:
And then hit the Play button in between the panels. When the request succeeds, we'll see the data come back through from the GraphQL API:

We'll know that we've setup our GraphQL code correctly within the Rails application when we see this. This means we can now proceed to set up the frontend of our application.
TypeScript + React setup
There are two different ways we could go here:
- We could add React and Apollo to our application and live a happy and fruitful life using JavaScript.
- We could add React, Apollo, and TypeScript to our application and live a happy and fruitful life with an extra guarantee our code will be type-checked, and we won't fall into the easy trap of comparing a string to a number.
I prefer the second route, even if it is a bit more work in the setup. The second path eases the cognitive load involved with remembering the types of things -- like we would have to do in a traditional Ruby or JavaScript application. TypeScript can tell us the types of our variables, especially in an editor like Visual Studio Code, which frankly has excellent TypeScript integration.
On top of this, there is another package we'll use later on called Codegen that will generate TypeScript types for us directly from our Ruby GraphQL API.
TypeScript
To start off, we'll add TypeScript to our Rails application, which we can do by running this command:
This will:
- Add
typescriptandts-loaderas dependencies of our application inpackage.json. These packages are used to load and parse TypeScript files, andtypescriptcomes with a command calledtscthat we can use to check if our code is typed correctly. - Create a new file called
tsconfig.jsonthat contains all the configuration for TypeScript. - Configure Webpacker to load TypeScript files (anything ending in
.tsortsx), and it'll put a new file inapp/javascripts/packscalledhello_typescript.ts:
We can delete this file, as we won't be needing it.
One extra bit of configuration that we'll need to do here is to set a configuration value in tsconfig.json. Add this line to the compilerOptions list:
This will direct the TypeScript compiler to use React when it encounters a JSX tag. For more information about this option, read this documentation page from the TypeScript handbook.
React
Next up, we want to add React to our application. We can do this using a webpacker:install command too.
This command will:
- Create a
babel.config.jsfile that contains configuration for Babel directing it how to load React components. - Create a file at
app/javascript/packs/hello_react.jsxthat demonstrates how to use React within our application. - Configures
config/webpacker.ymlto support files ending with.jsx - Adds the following JS packages:
@babel/preset-reactbabel-plugin-transform-react-remove-prop-typesprop-typesreactreact-dom
This babel.config.js file that was generated contains some code to load a library called: babel-plugin-transform-react-remove-prop-types:
PropTypes allows us to specify the types for React components. A small example of this is available in app/javascript/packs/hello_react.jsx:
We will not be using PropTypes in our code because we'll be using TypeScript instead.
PropTypes has been succeeded by TypeScript.
Why on earth are there two ways to specify types in a React codebase? That might be what you're thinking right now. A little bit of history is that PropTypes has existed for a long time, while TypeScript has gained preference recently.
PropTypes allows us to specify that the name property for the
Hello component is going to be a string. When we load this code in the
browser, PropTypes will run and then validate that name is indeed a
string. If it's not, then we'll see an error appear in the developer console (if
we're looking there!). This is what we'd call a runtime type check -- the
code is type-checked when it runs.
TypeScript allows us to do the same sort of validation, but it will run at compile time, right when the code is being "translated" into JavaScript for the browser's consumption. This is the right step (imo) because while you're writing the code, you want to know if you've made a mistake -- not when you're running it! The other advantage is that TypeScript has excellent editor integration, and it will warn you about incorrect types. We'll see a few of these examples later on in this guide.
So let's remove this configuration from babel.config.js, as well as removing the prop-types and associated babel plugin:
yarn remove prop-types babel-plugin-transform-react-remove-prop-types
This will mean that the packages that have been added by webpacker:install:react are now just:
@babel/preset-reactreactreact-dom
The @babel/preset-react package configures Babel to parse JSX content into regular JavaScript code, and a few other niceties that we don't need to care about right now.
The two other packages, react and react-dom, are the most useful of the lot, as they allow us to use React and have it interact with a page's DOM (Document Object Model). This work is separated into two packages, as React can be used in other contexts outside of a DOM, such as React Native.
Let's take a closer look at what app/javascripts/packs/hello_react.jsx contains:
Now that we've taken out the prop-types library, we can remove all the propTypes code from this file:
That's much easier to read now!
This file imports both the React and ReactDOM libraries. We need to import React wherever we're using JSX. And we import ReactDOM whenever we want to put a React component somewhere on our page.
Next, this file defines a small function component, returning a simple <div> with a message inside it.
Finally, this code waits for the DOMContentLoaded event to be sent out by the browser, and then it will append this component to the <body> tag of whatever page has included this JavaScript.
Rendering React within Rails
Let's take a look at how to render this React component within our Rails application.
To get started, we'll create a new controller, view, and route by running this command:
The route this generates will be in config/routes.rb and will look like this:
Let's change this to be a root route so that we can visit it using http://localhost:3000/ instead of http://localhost:3000/home/index.
Once this route has been changed, we can go to http://localhost:3000 and see the view that was generated:

This view is not currently rendering our React component, but we can make it do so by bringing in the hello_react.jsx file with this addition to app/views/home/index.html.erb:
When we refresh the page, we'll see the React component appended to the bottom of the page:
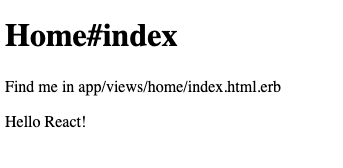
Excellent! We now have a way to make React components appear on our Rails views.
However, there's a caveat to this: these components will always appear at the bottom of our pages! If we were to add a footer to the bottom of the <body> tag within our application layout, these React components would appear underneath that footer. That is not ideal!
What would be better for us is to be able to insert these components wherever we wish on the page. This will enable us to have Rails-generated HTML sitting along-side React components that also generate their own HTML.
So to work around that, we'll devise a way to mount React components at particular places within Rails views.
Placeable React components
What we now want to be able to do is to be able to put a React component anywhere in our view. Let's say that we wanted our "Hello React!" to appear between the h1 and p tags in app/views/home/index.html.erb:
We cannot put javascript_pack_tag there, as the code in hello_react.jsx will still direct the component to be appended to the body tag:
So what can we do instead?
Well, another way we can approach this problem is to have our code look for particular types of elements on the page, and then choose to put React components into those particular elements. For example, we can make it so if we were to write this code:
A component called Hello would be added between those <h1> and <p> tags.
To put this little div tag inside our views, we can write a helper in app/helpers/application_helper.rb:
This code in app/views/home/index.html.erb will generate that div:
If we wanted to support parsing properties to this method, we could make this code:
This takes a list of properties and passes them through as an extra data-props attribute on our div, and so allows us to write code such as:
However, if we go and refresh that page again, we'll see the component is not being rendered in that spot -- it's still being rendered at the bottom of the page:
But if we inspect the source code for our page, we'll see that the <div> exists`:
In order to fix this up, we're going to need to write some additional code that will scan for these tags containing the data-react-component attribute and then act on those tags.
Scanning for and mounting React components
The code that we're going to use to do this scanning and mounting the React components is the most complicated code we'll come across in this guide. Please bear with me! What we'll do here is work on making this code work, then we'll go through it top-to-bottom.
We'll put this code in a file called app/javascript/mount.tsx:
And over in app/javascript/packs/application.js, we'll add these lines:
Lastly, we'll need to export the Hello component from app/javascript/packs/hello_react.js:
With this change to hello_react.js, we've removed the code that was previously automatically inserting the component at the bottom of the page, and instead, we're now exporting this component and leaving the rendering of that component as something else's job.
That something else is that mount.tsx code that we wrote. Let's look at that again, step by step:
This code defines the mount function that we use in application.js. This function adds an event listener that waits for the DOMContentLoaded event to happen, just like the old code we had in hello_react.js did. Then we go a different path from there. Instead of rendering a specific React component, we're instead going on a search for which ones the page wants us to render. We find all the elements that are "mount points" for our React components by using querySelectorAll and looking for those elements that match the CSS selector [data-react-component].
Let's look at the next couple of lines:
We attempt to find out their component name for all of the elements mentioned by accessing the data-react-component property by using a combination of dataset and ["reactComponent"]. Once we have that name, we can then attempt to find that component by a name using components[componentName]. As long as we've chosen to mount a component in application.js with this function, it will be available here.
Let's look at the final few lines:
If this code finds a component, it attempts to parse the json contained in dataset["props"]. This will pull out the JSON from the data-props attribute on the <div>:
Then, now that the mount function has all three of the mountPoint, the Component and the props determined, it can use ReactDOM.render to put this code directly onto the page, exactly where we said it should go.
Let's refresh the page. This time we'll see the component is now in between the <h1> and <p> tags:
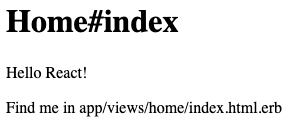
Hooray! We now have the ability to put our React components wherever we like on the page. This will enable us to intermingle our Rails view code with React components -- we can put static HTML rendered server-side by Rails right next to dynamic HTML rendered client-side by React.
Books React Component
Let's now look at something a bit more complex than putting "Hello React!" on the page. This time, we're going to build another component, called Books. This component will render hard-coded data from a TypeScript file onto div tags on the page.
When we write this file, we'll be declaring types using TypeScript and using those to guide us in what properties are available inside each of the components we build.
We'll eventually use this file to pull in and display the data from our Rails application's GraphQL. Before we get there, though, it will help to build a scaffold using static data so that we can experiment with it, if necessary.
Let's create a new file at app/javascripts/Books/index.tsx.
In this file, we start by importing React. This is necessary because we're using JSX in this file.
Next, we define the shape of the data that will be coming through to our component, mimicking the shape of the data that GraphQL gives us.
Next, we define a Book component that will render a simple <li> tag with a book's title.
Then we get to the Books component. This one uses the loading and data variables set outside of the component to pretend like it's loading data from our GraphQL service and then uses the Book component to render that data.
Finally, the Books component is exported as the default export. This will allow us to import it into other files using import Books from "./Books".
What we have here are the barest of bones required to render data using React and TypeScript in our application. This is just a few steps up from our "Hello React" example and moves us closer towards having this frontend talk to our GraphQL backend.
Mounting the Books component
To use this component, we will need to mount it within our application. We can do this by going to app/javascript/application.js and changing the end of that file to this:
This will now automatically render our Hello and Books components whenever they're requested through our application.
To request the Books component to be rendered, we'll go over to app/views/home/index.html.erb and add this line in:
Now when we refresh this page, we'll see our (very short!) list of books:
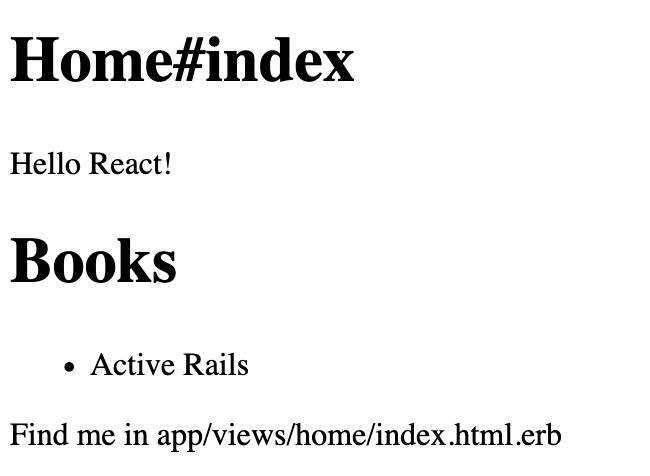
Success! The Books component is now rendering on the page.
One of the great things about this Webpacker setup that we have got going is that if you edit the code in Books/index.tsx and save the file, the browser will automatically refresh. Go ahead and try it out now!
The component is still working with data that we've coded in ourselves. The next piece of this puzzle is to configure the frontend code so that instead of pulling the data in from a hardcoded source, it pulls it in from the GraphQL API provided by Rails.
We can do this using a JavaScript package called Apollo.
Apollo
The Apollo Client is a widely-used package that is used to provide an easy way of communicating between the frontend and a GraphQL API. We'll use this package to replace the hard-coded data within Books/index.tsx.
Setting up Apollo
To get started, we will need to add the @apollo/client and graphql packages as a dependency. We can do that with this command:
If you're running bin/webpack-dev-server, make sure to restart it at this point to make sure it can load the new dependencies.
Next, we will need to configure this Apollo Client to speak to our GraphQL API. We can do that by creating a new file at app/javascript/graphqlProvider.tsx and putting this code inside it:
This code does two main things.
The first thing is that it defines client, which sets the groundwork for how Apollo is configured to connect to our API. By using HttpLink, and not passing it a URL, Apollo will default to making requests to /graphql -- which is exactly where our GraphQL API is hosted.
This client variable uses the csrfToken from the page as well, ensuring that the requests pass the CSRF protections built into the GraphqlController for our Rails application. If we did not do this, in a production environment, users would not be able to make requests through to our GraphQL API as Rails would block their attempts due to null CSRF tokens being passed in.
The second thing this code does is the withProvider variable. This function wraps a passed in component in the ApolloProvider component, allowing that wrapped component to make calls to the GraphQL API.
Using Apollo in our Books component
With this code setup, we can now turn our attention back to Books/index.tsx. We want to convert this code to do a GraphQL query to load its data. We can start this process by defining a GraphQL query at the top of this file:
To use this query, we can use the useQuery hook function from Apollo. We must first import it:
Then we can use it inside the Books component:
Note that for the most part, the API is the same. We are still using the loading variable, and the data is available at data.books.
The last thing to do here is to use the withProvider function to wrap the Books component.
First, we'll need to import it.
Then we can wrap our Books component when we export it:
This will make it so that the Books component has access to the Apollo client we have configured, and that will mean the Books component will be able to run its GraphQL query.
When we refresh the page now, we'll see that the data is being loaded from our API! We've now successfully connected our first React component back through to our GraphQL API.
We're not completely done yet. There's one more issue hanging around. That issue is that the data variable that is coming back from our query is completely untyped. I can see this in Visual Studio Code by hovering my cursor over data. Here's what I see:
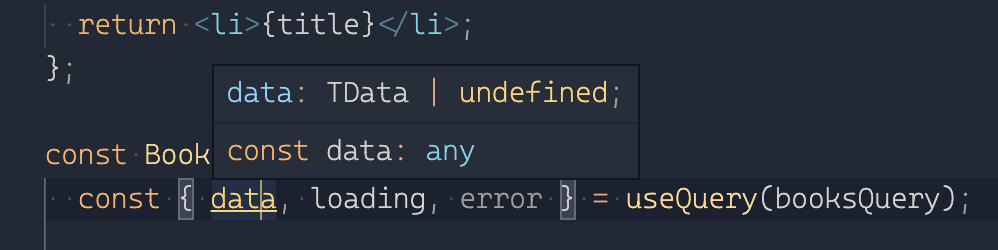
This is problematic, because it means that we're not having the properties we call on data be typechecked. This means we can write this code:
And TypeScript won't tell us that notBooks is not a part of the returned data. Further to this, the book type is also any, and the correctness of that data is only enforced by the earlier BookType declaration we made earlier, and that we're still using in the Book component.
We need to rectify this and ensure that we have accurate types from our data right from the moment they come out of the API responses.
Sharing types between backend + frontend
In this final section, we'll make it so that we can have our frontend read and understand the types specified by our backend. We will do this by using a combination of features from the graphql gem, as well as a series of JavaScript packages from the @graphql-codegen family.
When we write GraphQL queries, we must specify the types for all the fields. For example, over in app/graphql/types/book_type.rb we specify the types like this:
These types are here so that we know what kind of data we're working with. We know that title is going to be a string and that created_at is also going to be returned as a string... except it's a string formatted as an ISO8601 timestamp as indicated by its special typing.
We want these types in our React code so that we can be sure we're working with them correctly. But these types are in Ruby, not in JavaScript. So how do we get them out of Ruby, and into JavaScript?
The way we can do this is with a Rake task built into the graphql gem itself which will allow us to dump the GraphQL schema out to a particular file. This schema will be a JSON representation of our GraphQL API, and enables introspection of the API. If you've ever wondered how GraphQL apps like GraphQL Playground and GraphiQL know what fields are available, this is how! The application reads that schema, and from that, it will know the fields and their types.
We can dump the schema for this application by using a Rake task that is built into the graphql gem. That task needs some configuration so that it can find out where our Ruby schema is, and where to dump the JSON schema definitions to.
Once we have that schema dumped, we can generate types from that dump by using a JavaScript package called codegen.
Dumping types from the GraphQL backend
Let's start by dumping the types from the backend using a Rake task. Let's create this Rake task and specify its configuration, adding these lines to the Rakefile within our application:
The GraphQL::RakeTask.new initializer is responsible for registering the Rake task with Rake. The schema_name option tells it where to find the schema, and this name must match the schema class name in app/graphql. It's the name of your application, followed by the word "Schema", typically.
The directory option tells this Rake task where we want to put the JSON schema definitions.
And finally, dependencies tells the Rake task first to run the environment Rake task. This environment Rake task is responsible for loading the Rails application environment, and it will load the BooksSchema class as a part of that work.
With the Rake task setup, we can now run it by running this command:
This command will read our schema -- written in Ruby -- and convert it into a JSON file, which can be read by JavaScript.
Generating types from the dumped schema
Now that we have our schema dumped out, we can load it in using a package called @graphql-codegen/cli. We will need to install this package first:
Once this package has been installed, we can run another command to configure it. This configuration will ensure that Codegen works exactly as we want it for our application. We can kick off this configuration step by running:
This command will prompt us for a few separate things:
- Application built with: Choose "React"
- Schema:
app/javascript/graphql/schema.graphql - Operations and fragments:
app/javascript/**/*.tsx - Plugins: Leave default selected
- Output path:
app/javascript/graphql/types.tsx - Generate introspection file: Choose "no" because the
graphqlgem has done this already with the Rake task we just ran. - Name config file: Leave it as the default,
codegen.yml - Script in package.json:
gql:codegen
Why not use a URL for schema?
You might've noticed that the default option for "Schema" above is a URL. We
could put in http://localhost:3000/graphql here, and Codegen would still work. The only thing about that is that we must have a Rails server running at all times to have our Codegen command work.
I think it's better having a schema file that is generated through a Rake task, and then you don't have to remember to run a Rails server. You might think differently, though! And that's alright too.
This init script will then install more codegen packages that will assist us. These packages will appear within the package.json devDependencies list:
- @graphql-codegen/typescript
- @graphql-codegen/typescript-operations
- @graphql-codegen/typescript-react-apollo
These packages are the ones that will be used to generate the types for our TypeScript code. The codegen series of packages will do this by reading from the schema.graphql file that was dumped from the rake graphql:schema:dump Rake task. The way to make codegen generate these types is by running the package.json script gql:codegen:
This command will read that schema.graphql file and generate TypeScript types into app/javascript/graphql/types.tsx. Note that this will only read from the schema file generated by rake graphql:schema:dump rather than constantly being updated by the backend automatically. So you will want to get into the habit of running both the Rake task and the Yarn command at the same time:
Let's go through what each of these Codegen packages provides us, to better understand what we're getting out of using this tool.
Codegen + TypeScript
The first package, @graphql-codegen/typescript, generates TypeScript types from objects in the schema. If we go to app/javascript/graphql/types.tsx, here's a couple of the types that we will see:
First, there are some scalars that define shortcuts to common types. These are used a little further down when the Book type is defined to specify the types of fields that are available for Book objects according to our API. You will notice there that the title property is specified with a question-mark. That means that this property can be missing completely from the returned object.
These types provide us the groundwork for types in our application's TypeScript code. If we were to use these, we could leverage the shared types between the backend and the frontend. Our frontend couldn't use types that aren't correct according to the backend.
But this picture is not complete without the two other packages here, so let's cover those first before we look into how we can use those types.
Codegen + TypeScript + GraphQL Operations
The second package, @graphql-codegen/typescript-operations, generates TypeScript types from the operations and fragments we've specified in our TypeScript code. An example of an operation is this query in app/javascript/Books/index.tsx:
The @graphql-codegen/typescript-operations package scans our TypeScript files for these operations and will generate corresponding types for them. If we go to app/javascript/graphql/types.tsx, we'll see the generated types for this query:
The first type here says that the allBooks query does not take any variables. The second type specifies that when the AllBooksQuery returns data, it does so with a key called books, and that the value for that books key will be an array of items that are shaped as the Book type specifies, but just the title field from that type -- as indicated by Pick<Book, 'title'>.
This type can be used to ensure that we're only accessing data that our GraphQL query returns. The second type here specifies that yes the query does return an array of books... but it also says that the information that will come from that query only consists of the title field. There is no other field there.
We can use this second type in our code by specifying it as a generic in Books/index.tsx:
This says to useQuery, that the type of data being returned by this function will match the shape specified by AllBooksQuery.
If we look a little further down in our file, we'll see that the code is failing because we're trying to access the id property from a Book object:
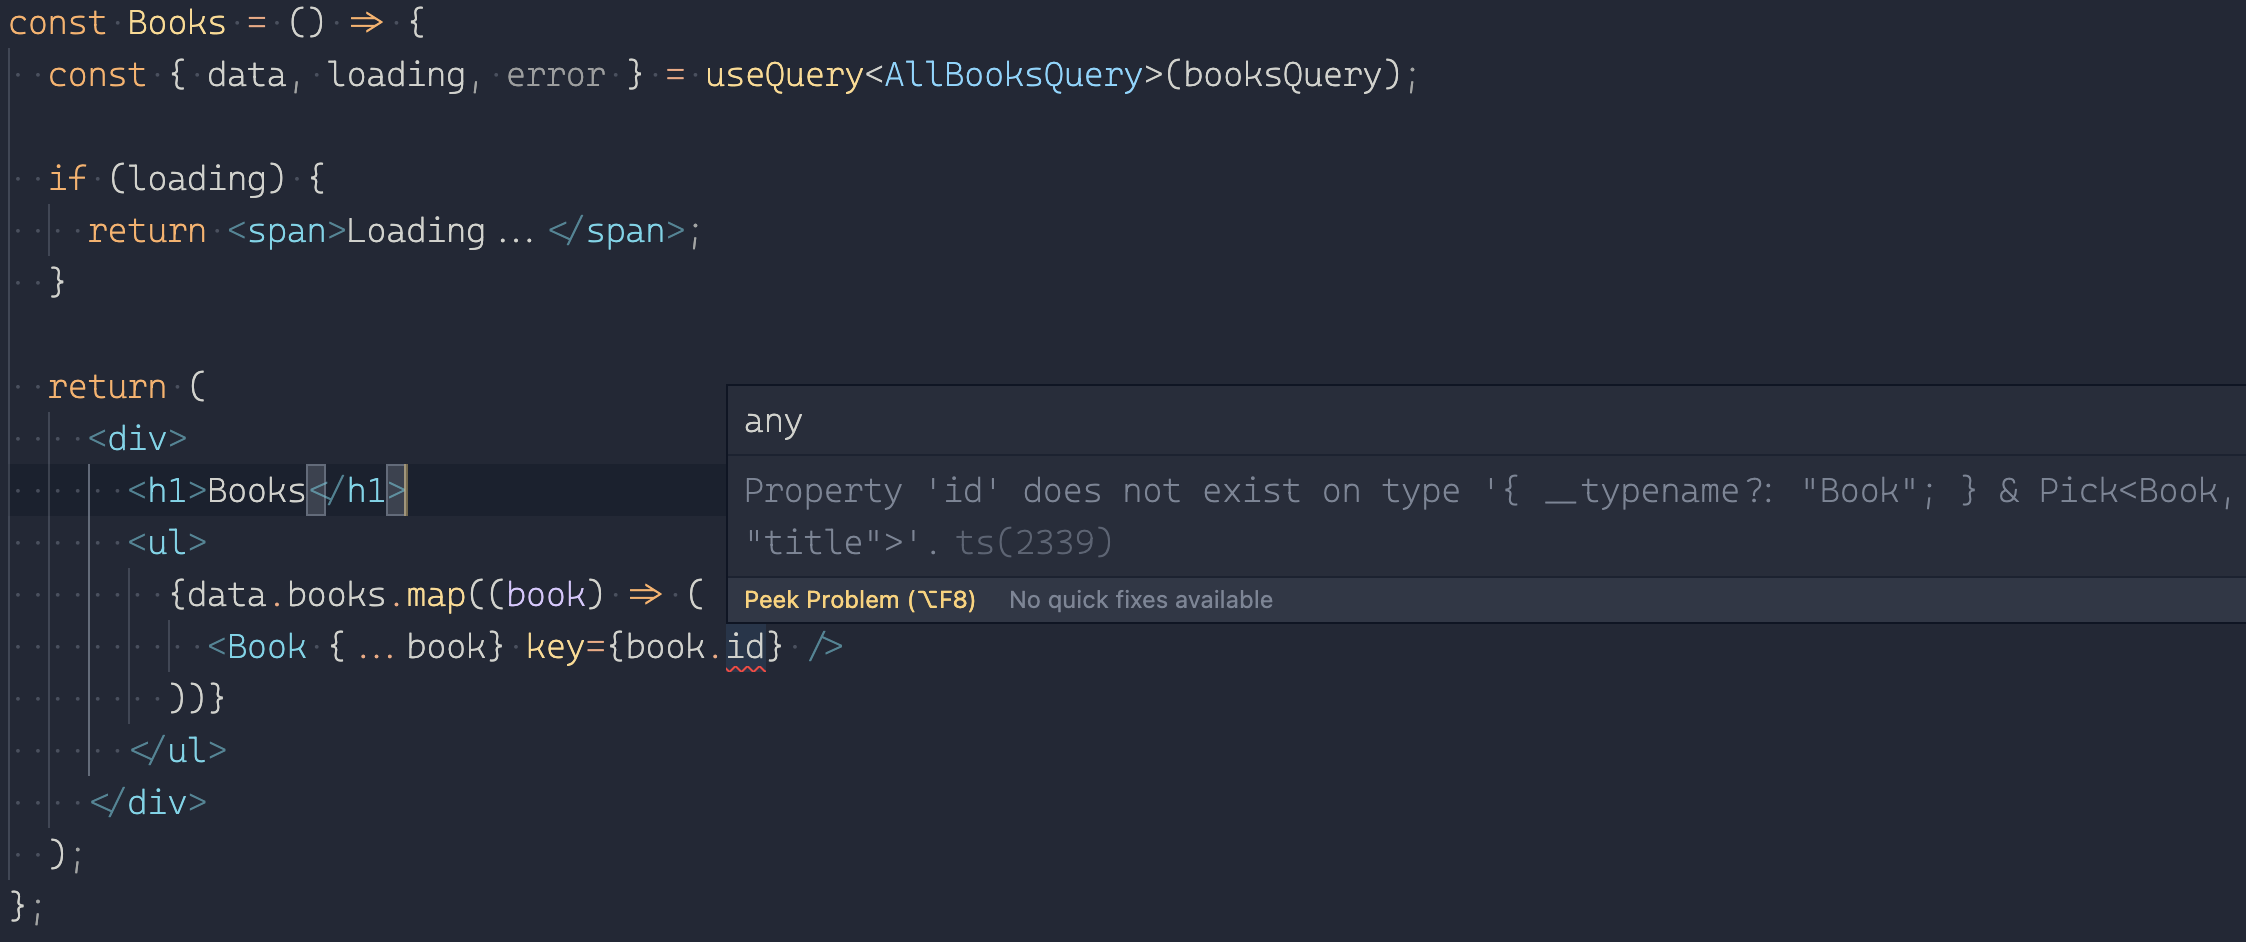
We're seeing this message from TypeScript because our type for AllBooksQuery does not specify that books returned from that query have an id property. TypeScript is smart enough to know that we're making a mistake here, and it quickly points it out!
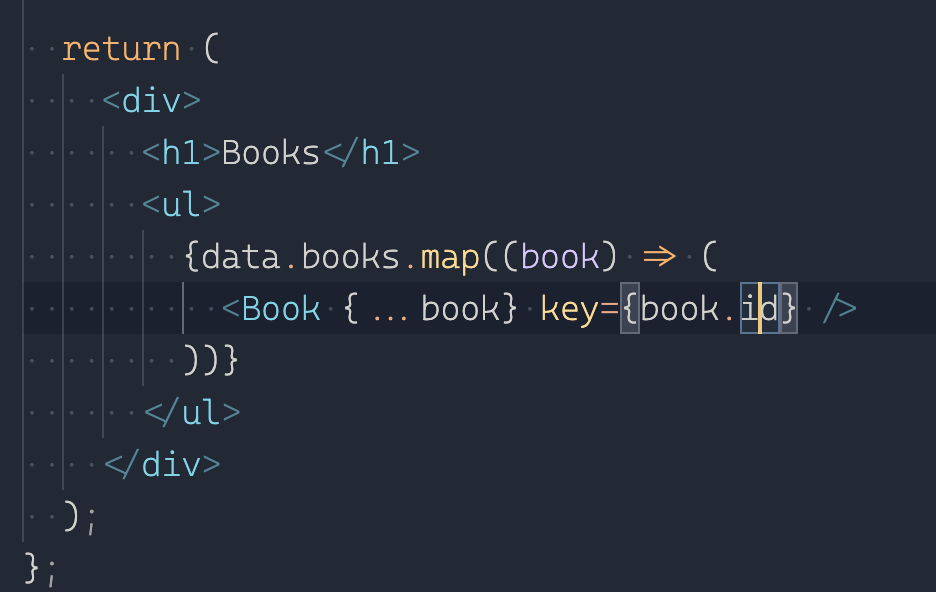
We can fix this by adding an id field to the query in Books/index.tsx:
And then by regenerating the types using:
This last command updates the AllBooksQuery type to this:
This is a type that now specifies that Book can have title and id specified. If we look back at the place where the error previously was occurring, we'll now see that it is fine:
This is the benefit that we get out of using @graphql-codegen/typescript-operations. This package inspects the queries that are used in our application, and it will generate types from them. Those types can then be used by TypeScript to inform us if we're requesting correct or incorrect properties.
Codegen + TypeScript + React + Apollo
The final package that is added by Codegen's init script is one called @graphql-codegen/typescript-react-apollo. This package brings together all of the previous parts into one very neat cohesive whole.
This package does not provide us with types, but instead it provides us with functions. Specifically, it provides us with hooks that we can use in our React components to shortcut the necessity of specifying AllBooksQuery or AllBooksQueryVariables as type arguments.
Here's one of the functions it provides us:
We can call this function in Books/index.tsx by first importing it:
And then using it in place of our previous useQuery invocation in that same file:
Isn't this much nicer than what we just had there?
By invoking this function, we are getting Codegen to do the heavy lifting of specifying the type arguments for us. If we did not have Codegen doing this, then we would need to write it all out ourselves. A full query, including query variables, would need to be written like this:
That is quite messy and would require us to import all of these different things into this file.
Instead of doing that, we can use @graphql-codegen/typescript-react-apollo and that will provide us small functions like useAllBooksQuery that we can use to ensure we have accurate types from the backend all the way through to the frontend.
To ensure that this is working as intended, we'll try to replicate that "Property 'id' is missing" error we saw before. We can replicate that error by removing the id field from the booksQuery in Books/index.tsx:
Next, we'll run yarn gql:codegen to regenerate the types for this query.
Once that command completes, we'll see that the id property is missing again:
Excellent! This means that it is all working as it should.
What we've accomplished
By using the graphql gem within the Ruby part of our Rails application, we've been able to expose data from our database through a GraphQL API. We then read that data using a combination of React, Apollo, and TypeScript on the frontend.
When we're using TypeScript, we need to be able to know the types of our data. This will ensure that our program is as correct as it can be. While we could define these types ourselves -- as we saw earlier on when we were setting up TypeScript -- it is instead better to automatically generate them from the GraphQL API's types instead. The way we do this is with a combination of the graphql gem's Rake task (defined in Rakefile), and another command called yarn gql:codegen. The latter command outputs types to app/javascript/graphql/types.tsx, and then it's from that file we can import things like the useBooksQuery function and Book type, if we require it.
One other thing to remember is that thanks to the @graphql-codegen/typescript-operations
All of this work is designed to set a solid foundation for a GraphQL API.